Showing posts with label Rag Bag Rescue. Show all posts

Thursday, 20 February 2014

A little bit of this and that...


The Happy Little Stitchery had its first stitchers on Saturday, and they seemed to have a happy time!


In the morning I got into the swing of things with a select group of two, one of whom I had met at The Maltings Market, along with her friend.  I taught them a bit of simple embroidery so that they could either take home an embroidered hoop picture or a needlecase.  


It was good see which stitches different stitchers found easier and which they found harder, especially as I was having a group of six in the afternoon, and it allowed me to slightly alter the order in which I taught the stitches.

I did, of course, forget to get my camera out until the very end of the day, when two of my afternoon stitchers had already left, but at least I did remember in the end!


And here's some of the work produced!  I have already had two of my friends pop by for a little help getting started on their next, independent projects - one to get a water-soluble line drawn on her fabric (the local shop had run out of pens) and one for a suggestion of what to do next!  


Next came a bit of bunny making.  The sleeves from a beautifully soft but somewhat shrunken cashmere jumper, four 'Sarah Moore Home' bunny outlines, a bit of sewing, snipping and stuffing (plus a wee bit of embroidery, but that doesn't fit my alliterative theme)...


Et voila!
Spring bunnies..


Next, I decided to have a go at designing my own simple patchwork block.  I wanted something fairly straightforward that would be good for teaching to those who want to learn to use a sewing machine.  I used some scrap-booking papers and fiddled around till I got what I wanted...


Then selected some scraps of (mostly) vintage fabric and stitched away...


A bit of further embellishment and this is what I had...


Although it was originally intended as a cushion cover, I found an empty frame, not quite the right size, but rather like this framed!  Another one for my somewhat over-burdened walls!


Today I had an exciting little package in the post.  My Mum had this book when I was a child and I used to try hard to learn stitches from it.  


The one I could NEVER make work was the French Knot.  Try as I might, it always disappeared!  And so it would still be, were it not for the wonders of stitch demonstrations on YouTube!  I think YouTube justifies its presence in the world simply on account of being the place where I finally found out how to  get these little devils to work!  


I am pleased to say that all my stitchers on Saturday mastered No. 21!

Last night, me, Miss U-t-B and her cousin (who is staying with us this half-term week)  went to see 'Cuban Fury'.  It was a great laugh and I came away with the salsa beat so firmly embedded in my head, feet and hips that I had to have a cocoa to calm down before bed!  If you like a bit of fun (and don't mind a bit of fruity language!) do go and see it!

Lastly, I just finished reading this...


A sweet book, I really enjoyed it!


Tuesday, 18 February 2014

Baby bootees grow large


You may remember these from last year...


Made as part of my challenge to see how many items I could make from one shrunken jumper, they are based on Heather Bailey's Bitty Booties, which you can find out all about here.


Well, one of the girls in the charity shop wondered if it would be possible to make some to fit her.  I'm always up for a challenge!

The perfect opportunity came when a whole heap of woollies came into the shop recently.  They were well worn - picture threadbare elbows and grubby cuffs - as well as unwashed, and therefore most definitely not suitable for the shops.  I couldn't bear to see them head into the rag bag (all 100% wool, mostly hand wash or dry-clean only) so some came home with me and found themselves given the indignity of a hot wash tied into a pillowcase with a tennis ball or two! 

I found a slipper pattern in a Tilda book I have and used the sole pattern as a guide, then scaled up the shape of the upper from Heather Bailey's pattern.  I decided that one layer of the felt I had created would not have been warm enough, nor indeed hard-wearing enough, so used two different jumper backs to cut linings and outers for the slippers.  

Some embroidery was required to jazz up the slippers. I was hoping the rain would give way to snow if I stitched enough snowflakes so off I went!

In the end, not one flake of the pretty fluffy stuff has fallen on us here in Hampshire, but I did finish the slippers...


The sole and the uppers were stitched by machine first (on triple stretch stitch) then finished with blanket stitch.


I hope the recipient will like them when I take them in for her on Wednesday!


Thursday, 8 August 2013

Rag Bag Rescue - East Dress


A little while back a pretty kaftan came into the charity warehouse.  It was too faded and rubbed at the bound edges to go into one of the shops to sell, so I asked if I could do a transformation on it.  

Here it is before I got to work with the scissors!  The colours are really pretty, and I love the Indian block print type fabric.


Being a kaftan, there was plenty of fabric to work with.  

First I made a little dress from a well-used pattern (McCalls 6059)...


Next, I used some complementary fabric from my stash ( might be yarn-dyed Essex linen)  to make some shorts.  I trimmed the pocket edges with scraps from the kaftan...


...And  changed the cuffs into tie ones, with the facings offering another glimpse of kaftan!


I am still loving using a twin needle for most top-stitching.  All those years I didn't know I could simply thread up two spools from the top to achieve this...


There was still a good deal of fabric left, so onwards and forwards it was to find a pattern I could squeeze onto the remaining bits.  The tiered summer top from my favourite Japanese children's dressmaking book was just the ticket.  


I already managed to sell the dress to the manager of the warehouse, so the charity is a tenner up already.  If I can just sell the other two, I hope I will have made about £30 in total, from one item that would have been worth pennies (or less) in the ragbag.  Hoorah!

Thursday, 18 July 2013

Rag Bag Rescue - Blokey Shirt to Birdy Smock


I might easily have called this post 'A Series of Unfortunate Events' as I made so many mistakes in its making, but in the end, I think it turned out okay!


A couple of weeks ago I rescued this man's shirt from the Rag Bag at the charity shop.  It had been consigned there due to its floppy, well-washed status, and a few pesky stains. But it was a nice large size in lovely chambray-type fabric, and I thought would be good for a re-make.


First I made a new pattern - well, actually a familiar pattern in a larger size. This was to be a 110cm size, aimed at a 4-5 year old.  It is from this Japanese book., which is now available, with a different front cover, in English.  (You can buy it on Amazon, but they aren't paying me for a plug!)


I have made loads of these smocks now.  Such a sweet and easy-to-wear design.


First I had to lay my pattern pieces out to see if I could get it all out of the decent parts of the fabric, going with the straight grain.  The front and the top part of the back fitted on the back section...


The two bottom back sections fitted on the front pieces, beneath the large breast pockets.  These pieces were meant to be one, cut on a fold, but I reckoned that a centre back seam was going to be okay.


It was a push to fit the two sleeve sections as the shirt sleeves were made of one wide and one narrow panel, reducing the available width.   It was just do-able though!  

My first mistake was that I had drafted the bottom sleeve section without adding the necessary seam allowances ( I normally add the seam allowances to my paper pattern pieces, otherwise I know I WILL cut something wrong!).  I merrily cut the pieces out before remembering the lack of seam allowance on that one piece!  There was no altenative but to go ahead with making the sleeves slightly shorter and less full than they should have been.


So, with all my pieces cut I stitched away.  The pin-tucks, which I messed up last time and had to press the wrong way and embellish...


...I got right this time!

But then I stitched the back to the front section right side to wrong side, ending up with the tuck on the back instead of the front.  But I decided that I quite liked this as an alternative, so left it.


I used some pretty 'Felicite' from Liberty as the binding and embellished with some weeny polkadot buttons.


My next problem was a hitherto unseen stain, right slap-bang in the middle of the front!  I knew it would be noticeable where it was.  There was nothing to be done but to find a decorative way to cover it up!


A bit more 'Felicite' and the design I used in my recent ATC swap...


...and the front acquired a trio of swooping birds!


Sleeve edges, hem and neckline were all 'Felicite' bound.  The button loop too...


Ta-dah!


Tuesday, 9 July 2013

Rag Bag Rescue - Mis-shapen T to Baby Beach Cover Up


Ever come across a t-shirt like this?

Pretty colours, no stains or damage but grown short and wide in the wash.  Too good to throw away, but no good to wear either.

(This one was a size 20-22 from Tu, but I guess smaller ones would work too.  I rescued it from the rag bag at the Charity shop.)


Here's something easy, and quick to do with it.


Use a water-soluble pen to draw a scoop that comes right up to the neckline.
Then draw a slightly curved diagonal from the end of the scoop to roughly halfway down the armhole and a line tapering outfrom that point down to the t-shirt hem. Don't undo the hem - you're going to use it as the hem again.  I always hated hemming, so any chance of not having to do one and I'm there!


Cut out.

You'll have created  a shape that when folded in half looks like this.  


Pin the side seams, then, using a suitable stitch on your machine and a ballpoint needle, sew them up.  I started at the hem end, to ensure a perfect match - if you start at the top, one layer might just stretch a bit more than the other, and your hem will have a step in it.  And nobody wants to have to undo a triple-stitched seam (that's my 'jersey' stitch)!


Trim the seam.  If I wasn't in such a tearing hurry to get this done so I could so a sewing post, I'd have finished the seam with overlocking or some such thing.


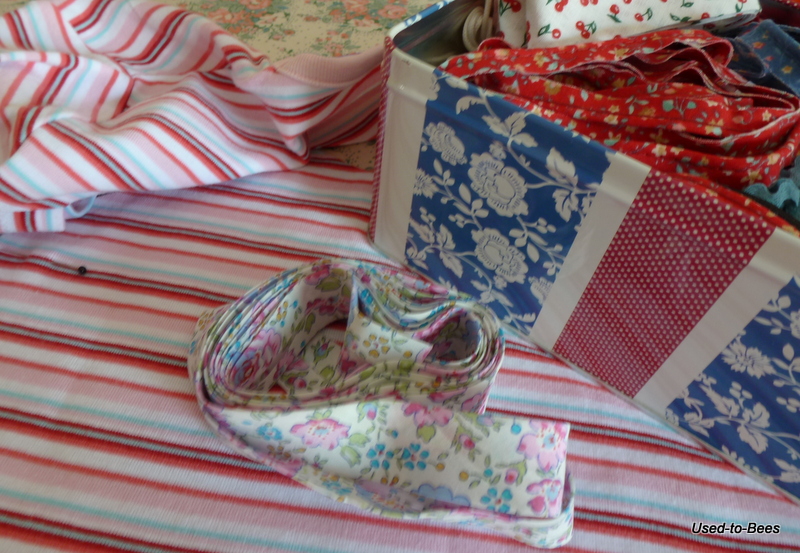
 Find some bias binding.   This Liberty 'Felicite' one has very similar colours and I do like to squeeze in a bit of Liberty love if I can.  You need enough to bind the armhole edges


Open out one side of the bias and stitch it, right sides together to the armhole edge.  I don't pin when I do this as it is easy to just 'feed' the bias and stitch in the ditch of the fold.


Trim the seam slightly then press the bias up, away from the garment.  Fold the bias over the seam allowance and press.  I prefer to fold very slightly more to the back so I know that when I stitch the bias from the front I will definitely have caught the back in properly.  


Top stitch the bias from the front, thereby catching in the folded over portion.  If you are worried, a bit of tacking is worthwhile here.


Now create a channel at the top of the front and back sections by ironing a double fold and top-stitching.  I tacked this.  Tacking stitches are rarer than hen's teeth in  my sewing - this is a remarkable shot!  The channel needs to be wide enough to take some elastic.


Thread a length of elastic through the channel.  I used a bit of guess work here to judge how long it should be - mine was about 15cm long, to create a gently gathered scoop.  Ideally, the planned wearer would have been in attendance and I could have checked it was right, but this wasn't the case, so estimation was the name of the game.  


From the leftover bits of t-shirt, cut 6 folded-over strips.  Mine were about 3 cm wide, folded in half.  I took mine from the sleeves, and made them as long as possible.  I used the folded bit from the sleeve hems and then two more from each sleeve.  


You need them to stretch lengthwise, so I couldn't have cut them from the leftover bits cut from the armpit to hem.


Plait your strips to make shoulder straps.  Don't plait too tight!  Attach, ideally with the recipient in place to ensure a good fit!  


Ta-dah!


Buttons are a nice finishing touch...


But which bag?


And this is all that's left of the t-shirt.  Acceptable wastage I think!