Wednesday, 28 November 2012

What's-on-my-Bookshelf-Wednesday - Biscornus et Pique-Aiguilles

Here's a lovely book I bought when I was in France in the summer...

Available through Amazon

'Biscornus et Pique-Aiguilles' or 'Biscornus and Pincushions' 
A biscornu is a clever little thing constructed out of (usually) two squares, then oh-so carefully sewn together to arrive at this shape...


Photo courtesy of Save the Stitches by NordicNeedle where you can find some very good  looking instructions for how to create a biscornu

I had never heard of a biscornu until I started reading blogs - ah, the educational power of the internet!

Look at some of the lovelies from the book...


Two-square biscornu

They can be used for pincushions, but also as decorations (small ones dangling from a sparsely decorated Christmas tree would be lovely) and for keyrings, scissor fobs and the like.


Fifteen square biscornu


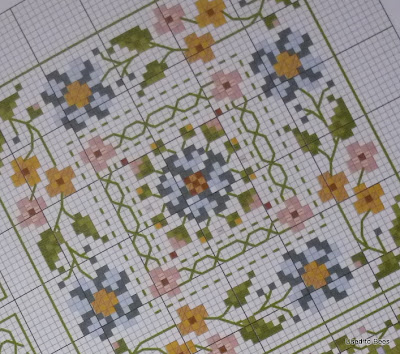
Lots of sweet charts...


Elf?  Pixie?  Who cares - I love the little peeps in the book (there are quite a few)...


Charts for large and small squares, so you can chose depending on your level of patience and how much time you have available...


I haven't yet managed to get started on any of these, mainly because I can't choose which to do!  But when I do, you know you're likely to see the results here!


Tuesday, 27 November 2012

Oooh, er, missus (Part Two)

So, if you have been with me a VERY long time (more than two years, in fact) you will be aware of the fact that I rather like Mr Bryan Ferry, even if whenever I see him I grow more and more perplexed. (See this post to find out why.)

So I was rather excited to hear him on the radio yesterday afternoon, talking about his latest project, The Bryan Ferry Orchestra, and their just-released CD 'The Jazz Age'.

I'm not a proper jazz fan, if you know what I mean, but I love its softer offerings and this sounds right up my street.  What's more, by heading to YouTube to listen to a few snatches, I get to see the man himself!  And because I am the generous sort, I will share him with you, right here and right now!  Have something close by with which to fan yourself if it all gets too much!


(It's a good thing they intersperse the Bryan shots with all the others, eh?)

And here's another snatch of the music...


One for the Christmas list perhaps?


Monday, 26 November 2012

Teeny-tiny Cottage Pincushion

Over the weekend I had a bit of a 'blog-tidy'.  My interest had been piqued by seeing the appearance of lots of handy-looking tabs at the top of other blogs (Hey look! I've got them now!) but the pages there made me realise that I don't very often put a 'How to' on here any more.  So, today I will begin rectifying this situation by sharing with you how I made a little pincushion that was very much admired at the weekend.


You will need:
a small bottletop 
scraps of felt in your chosen colours (walls/base/roof)
embroidery thread in a range of colours
a small amount of stuffing material
basic sewing tools, including a fabric marker (water soluble pen/tailors' chalk)

First measure the height of your lid - mine was about 2 3/4 cm tall


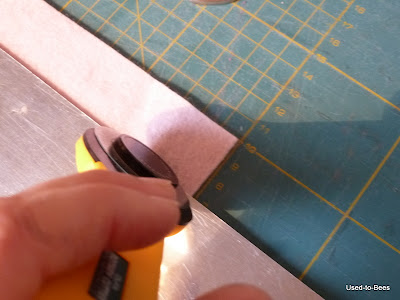
From a piece of wall colour felt long enough to encircle your lid, cut a strip a little taller than your measurement (I went for 3cm).  


Wrap the strip round your lid and cut to length, overlapping by about 3mm. Pin in place.


Use blanket stitch to secure the seam. (You can take the lid out as this makes it easier.)


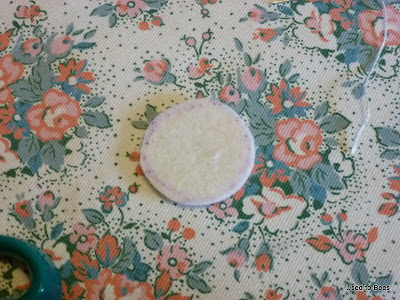
Place the lid on to a scrap of base colour felt and draw round it.


Cut about 2mm outside the line you have drawn.


Place the base felt on top of the felt-wrapped lid...


...then use blanket stitch to secure it in place.


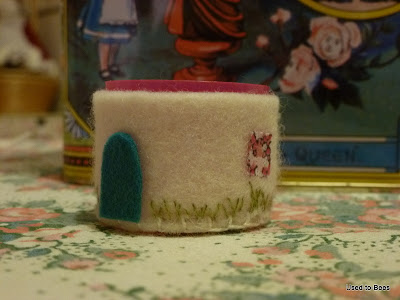
You will now have a felt covered lid.  Time to embellish!


First some grass most of the way round...


All embroidered with just one strand from the six in normal embroidery floss


...leaving space for a door. (Oh - you need to stitch that on!  I do back stitch to create the impression of wooden planks.  A door knocker or knob, a letterbox and a number are all possible additions!)


Add any windows you feel the residents will need...


Then fill their garden with flowers...


Teeny crosses and French knots...


...and lazy daisies in pairs, plus a few bullion knots.

Once you're done with the embroidery, place the upturned lid on a piece of felt the colour you wish your roof to be and draw round it.  Cut about 4mm larger.


Run a tiny running stitch all round the roof felt to act as a gathering stitch...


Then draw up to make a little dome that sits neatly on top of the felt walls.  Fasten off the gathering thread and distribute the gathers evenly...


Stuff a little filling inside the lid and then use more blanket stitch to attach the roof to the cottage.


Just before you finish the blanket stitching, you can add a little more stuffing to raise the roof a little and give a  nice firm finish.


To make a chimney, roll up a tiny scrap of felt, secure with lots of tiny running stitches, then stitch in place...


Oh look!  A stem stitch and French knot rose bush has grown around the door already!


Add some special pins. 


It is finished!


Saturday, 24 November 2012

Q: When is a birthday cake not a birthday cake?


A: When it's a 'Not-Gingerbread-But-Lemon House'...


My icing was a little too sloppy giving this somewhat wind-blown effect!


I had such fun making this! 

(Heavens, I do say that a lot!)  

I used the recipe for plain biscuits from the Biscuiteers' book (which you can buy here, amongst other places), adding lemon rind for a little zing.  I followed the Biscuiteers' instructions properly, rolling the dough out between two sheets of baking parchment, then chilling it before cutting the shapes.  

The birthday girl and I had already drawn out a pattern for this size of house (about 4 inches square, to accommodate a tealight for the essential illumination) when we made the bigger one the weekend before last.  I just had to cut out the pieces, bake them, whip up some royal icing and pipe away.  Sweet decoration was subdued this time - only dolly mixtures allowed. (Editor's note: this may be because all the other sweets had been gobbled up before the house was ready...)

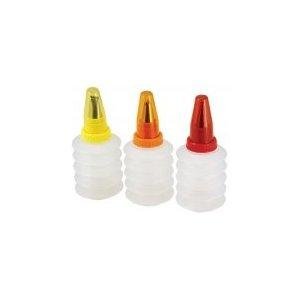
I do not have the steadiest of hands for piping, but I was still pretty happy with the outcome, as was the birthday girl.  My best discovery for this kind of icing task is the fabulous Tala squeezy bottle...


So much easier to manage than a piping bag!


The sparklers were great, as long as you didn't blink ('cos then you'd have missed them!)


I can definitely recommend biscuit-house building as a perfect recreation for a rainy day.  Looking at the weather forecast, we might soon have a whole village here!

Welcome aboard to new followers and thanks for all the lovely comments recently!


Thursday, 22 November 2012

One day soon...

...I WILL re-emerge from beneath a pile of fabric, threads and unfinished 'projects' in my sewing room.


(And then I will be so happy to return to reading, writing and commenting on blogs.  I feel like a very bad blogger right now...)

Monday, 19 November 2012

Memories

If we could wind back the clock sixteen years, almost to the minute, you would find a rather larger than normal me dancing around a side-room in Frimley Park Hospital, whilst my husband slept away the minutes (in the bed intended for me!)   

I have to admit, I WAS under the influence of drugs at the time (a brief dalliance with pethidine) but my head was clear and the song on the radio seemed prophetic.  


In those days, they wouldn't tell you whether the baby you were expecting was a girl or a boy (I wouldn't have wanted to know anyway), but I remember thinking 'Is this a sign?'

As it turned out, it was!
Tomorrow our lovely Ellen is sixteen.


(There'll be hell to pay when she finds out I've put these photos on here!  Better have the Iced Gems and Party Rings ready to placate her!)

Happy Birthday Lovely Girl!

Friday, 16 November 2012

Hot Toddy Cake

In an completely out-of-character moment, I got ahead of myself last weekend and made a start on a Christmas cake.  I would like to have done this on Sunday 25th, which is Stir-Up Sunday, but with a certain young lady's birthday celebrations being held that day, thought I would be unlikely to squeeze it in on the right day!  I am sharing this recipe here as I used it last year and it really was delicious - moist and fruity and moreish.

Last year's effort


I began by soaking the fruit 'overnight'.


700g mixed dried fruit, 100g glace cherries and 100g mixed peel soaked in 200ml hot, strong, black tea, 3 tablespoons whisky and 3 tablespoons marmalade

 Then I creamed together 225g butter and 225g golden caster.


4 eggs were lightly beaten and then gradually added to the mix, beating well after each addition.


225g plain flour, 1 tsp mixed spice and 1 tsp cinnamon were sifted together then folded into the mix...


Then the soaked fruit, and the grated rind of a lemon were folded through...


The mixture was then spooned into a 20cm round, double lined cake tin, levelled and baked at 160 degrees/ 140 Fan Oven/ Gas Mark 3 for 1 1/2 hours, then turned down to 140 degrees/ 120 Fan Oven/ Gas Mark 1 and baked for a further 1 1/2 hours till a skewer inserted in the middle comes out clean.  


Cool on a wire rack in the tin.  (Sorry - had given up with the camera by this time.  Try to hide your disappointment!)  Whilst still warm, use a skewer to pepper the cake with holes, then feed the cake with 50ml hot, strong black tea into which has been stirred 2 tsp sugar  and 1 tbsp whisky (or orange juice).

If you're making the cake ahead of time, you can feed it with a fresh swig of hot toddy each week, but take care not to make the cake soggy!  

The cake can be kept for a month, well-wrapped in an airtight container in a cool, dry place.  If short of time you can make and decorate the cake the same day.