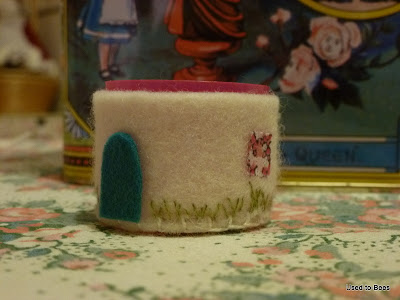
Over the weekend I had a bit of a 'blog-tidy'. My interest had been piqued by seeing the appearance of lots of handy-looking tabs at the top of other blogs (Hey look! I've got them now!) but the pages there made me realise that I don't very often put a 'How to' on here any more. So, today I will begin rectifying this situation by sharing with you how I made a little pincushion that was very much admired at the weekend.
You will need:
a small bottletop
scraps of felt in your chosen colours (walls/base/roof)
embroidery thread in a range of colours
a small amount of stuffing material
basic sewing tools, including a fabric marker (water soluble pen/tailors' chalk)
First measure the height of your lid - mine was about 2 3/4 cm tall
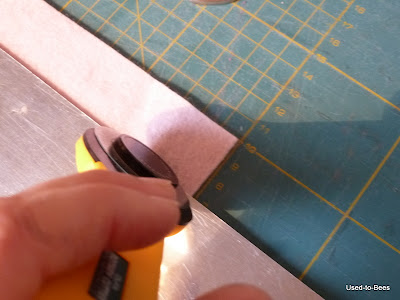
From a piece of wall colour felt long enough to encircle your lid, cut a strip a little taller than your measurement (I went for 3cm).
Wrap the strip round your lid and cut to length, overlapping by about 3mm. Pin in place.
Use blanket stitch to secure the seam. (You can take the lid out as this makes it easier.)
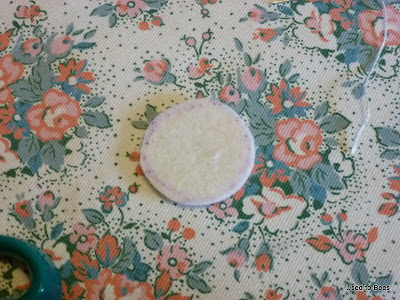
Place the lid on to a scrap of base colour felt and draw round it.
Cut about 2mm outside the line you have drawn.
Place the base felt on top of the felt-wrapped lid...
...then use blanket stitch to secure it in place.
You will now have a felt covered lid. Time to embellish!
First some grass most of the way round...
 |
| All embroidered with just one strand from the six in normal embroidery floss |
...leaving space for a door. (Oh - you need to stitch that on! I do back stitch to create the impression of wooden planks. A door knocker or knob, a letterbox and a number are all possible additions!)
Add any windows you feel the residents will need...
Then fill their garden with flowers...
Teeny crosses and French knots...
...and lazy daisies in pairs, plus a few bullion knots.
Once you're done with the embroidery, place the upturned lid on a piece of felt the colour you wish your roof to be and draw round it. Cut about 4mm larger.
Run a tiny running stitch all round the roof felt to act as a gathering stitch...
Then draw up to make a little dome that sits neatly on top of the felt walls. Fasten off the gathering thread and distribute the gathers evenly...
Stuff a little filling inside the lid and then use more blanket stitch to attach the roof to the cottage.
Just before you finish the blanket stitching, you can add a little more stuffing to raise the roof a little and give a nice firm finish.
To make a chimney, roll up a tiny scrap of felt, secure with lots of tiny running stitches, then stitch in place...
 |
| Oh look! A stem stitch and French knot rose bush has grown around the door already! |
Add some special pins.
It is finished!


Gorgeous!! Thanks for the tutorial.
ReplyDeleteLiz @ Shortbread & Ginger
This is gorgeous Alix!
ReplyDeleteThat is soooo cute!
ReplyDeleteThank you - it is perfect timing too - raining buckets again outside so guess what I am now doing this afternoon .....
Gorgeous!
ReplyDeleteJulie xxxxxxxx
Aw lovely Alix ... it definitely wouldn't look like that if I'd made it! xx
ReplyDeleteThe little house is so cute and so beautifully done. Thank you! M x
ReplyDeleteIt's so sweet! I'm not sure my big clumsy fingers would cope! :)
ReplyDeleteSo delightful. I thought the roof was to open & it could be used for when the tooth fairy visits ! ? Lovely pins too !
ReplyDeleteAaaarrrgghhh, if I didn't like you so much I could seriously dislike you - you are so darned clever!!! Uber-cute little pin cottage, thank you for the instructions (although fumble fingers here will NOT be attempting it!).
ReplyDeletex
ps your blog is looking really lovely too - another reason to go off you...;)
ReplyDeleteLove it. Thank you for sharing this tutorial.
ReplyDeletePatricia x
That is so cute Alix you are clever,your blog is looking brilliant.Love Jill xx
ReplyDeleteLooks like the round houses in Veryan in Cornwall. I am tempted to try and make one, my fingers don't always do as they told so the air maybe rather blue!! Penny B.
ReplyDeleteYou are so clever at making little things like this Alix - its so cute!
ReplyDelete