At the risk of boring some of you out there, I am going to post a little 'how-to' because I seem to have strayed so far away from blogging about sewing these days. I think when I originally started blogging, I thought I would put up stuff I thought would be useful from time to time, and I never seem to do that nowadays. But as I made a little discovery when making these, I thought I'd share it, in case it's helpful to anyone out there.
Anyway, if you're not into sewing in general and tiered skirts in particular, you can switch over now...
To make a tiered skirt for a little one, simply choose your fabrics and play around with combinations...
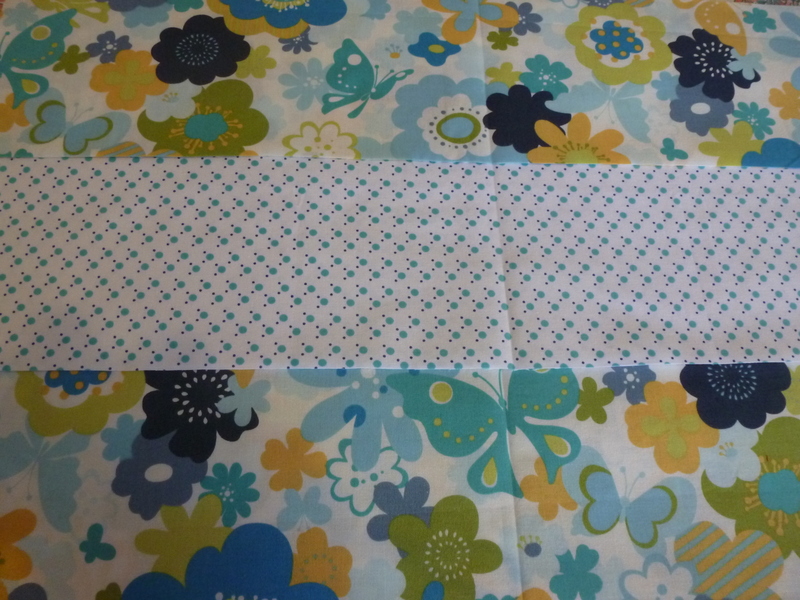

I used new fabric this time, but these skirts could easily be made from old clothes of your own, or charity shop finds. All you need is some long strips that are pretty much on the grain.
The ideal thing would be to have the child for whom you are creating this masterpiece close by, as you need to know the waist measurement and length you are aiming for. As I didn't have this luxury, I hunted online and on the backs of some patterns to get a rough idea. The waist was going to be elasticated anyway, so I reckoned this would be forgiving, and length didn't need centimetre accuracy either!
Once I had the waist measurement (41cm for example) the advice I'd read suggested I needed to multiply this by 1.5, 2 and 2.7 to get the lengths for the 1st, 2nd and 3rd tiers. So the lengths I needed for a 41cm waist were 61cm, 82cm and 110cm. I found these a little less flouncy than I'd have liked, so next time I would make each a bit longer - maybe using multiples 1.7, 2.3 and 3?
To get the width for each strip, I needed to decide on length of the finished skirt. I decided on approximately 24cm and divided by 3 (the number of tiers) to get 8cm finished width for each band, but then needed to add seam allowances. I added 3cm to tiers two and three (because I use a 1.5cm seam allowance on most things), but 6cm to the top (waist) tier, as this needed a wide channel for the elastic.
So for the small one year old, I cut:
61cm x 14cm in the fabric for the first tier
82cm x 11cm for the second tier
110cm x 11cm for the third tier
I used my rotary cutter and cut strips from selvedge to selvedge. Therefore, all it used was 36cm of fabric - pretty economical.
Of course, in larger sizes, you wouldn't get a whole strip from a width, so you would be better to cut length ways.
I prepared the elastic channel and the hem first, whilst the strips were still flat and ungathered. Normally you'd make each band into a ring and then sew these together, followed by the elastic channel and hem, but the 'flat' method is a nice easy way to make something quickly, especially if you are less experienced with a machine.
First the elastic channel, which needed to accommodate the 20mm elastic. First I pressed a 1cm turn along the top edge of the tier...

...then a further turn of 2.5 cm. It's worth being accurate with the allowances, as it will help ensure a neat outcome.

I then stitched the fold down, approximately 2mm from the fold, creating a neat channel for the elastic.

Don't put the elastic in yet - this pic is just so you can see what the channel will look like!
Next, the hem.
This was where I got to use the discovery I made. Years ago, in the days when I used to sew in the garden, in a bikini, with the radio at my side (and what is more, the sun shone!)...

...I had a sewing machine with a special twin needle setting. I loved using the twin needle for neat top-stitching, and when the machine died, I was very sad that my new machine had no such setting, or needle... I thought my twin-needling days were over! But then I read that you don't need a special setting to do this. You just buy yourself a twin needle and insert it into your machine as usual, wind a bobbin of thread to place on the pin alongside or next to your other spool of top thread, and thread the two as one.

...I had a sewing machine with a special twin needle setting. I loved using the twin needle for neat top-stitching, and when the machine died, I was very sad that my new machine had no such setting, or needle... I thought my twin-needling days were over! But then I read that you don't need a special setting to do this. You just buy yourself a twin needle and insert it into your machine as usual, wind a bobbin of thread to place on the pin alongside or next to your other spool of top thread, and thread the two as one.


I have to admit, that I did have a breakage - maybe I need to adjust the tension a bit.

But I just pulled the broken threads to the back, tied them off and re-started. With a bit of care, you couldn't see the join.

I used my twin needle on the hem, having done a double turn-up (0.5cm followed by 1.5cm). I forgot to take a close up shot to show how nice it looked!
Next I needed to gather the top edges of strip two and three before joining them to strip one and two respectively.
Gather with a double row of long stitches just inside the seam allowance. I always want to take a short cut and do only one row, but it does work so much better if you do two. When you pull up the threads, the gathers are more stable and when stitching the seam, the fabric will lie flatter making it less likely that you will catch up the wrong bits. You know it makes sense!
 |
| I always put in the gathering thread right side up. This way, once you have the wrong side facing you to join it to the next strip, you will automatically pull on the bobbin thread, which is better than pulling on the top thread. |
Once the gathering threads are in place, fold the two strips you are going to join in half, and mark with a pin. This will ensure that you get your gathers more or less evenly spread. You could mark the quarter points too, if you want to be really careful!

Matching the halfway marks, pin the 1st strip to the second strip, right sides together. I pin the ends and then pull up the ends. Only ever pull on the bobbin thread. If you pull the bobbin thread and then the top thread, you tend to 'lock' the stitches and it makes the job a real struggle. Well, that's what happens with my machine anyway!
Adjust the gathers evenly.

I pin across the seam because I am a lazy girl and rarely bother with tacking. I simply sew along my seam, stitching (s-l-o-w-l-y) over the pins if I'm in a devil-may-care mood, or removing them just before I reach them if I feel like bad luck is coming my way. (If you go too fast you may well break a needle. At that point it is good to be wearing glasses. You have been warned!) This is another place to be accurate. If you don't keep an even seam allowance, your strips and hems may not match when you finally join at the back.

Trim the seam, then zigzag to neaten.

I rather like to remove the gathering stitches at this point. Simply pull that bobbin thread right out, then fish around for the other thread.

Repeat the gathering and joining with tier three to tier two.
Then you need to insert your elastic. I cut a piece the length of the waist plus about 2cm to allow for the seam. In most tutorials it says you should make the elastic about 10% shorter than the waist measurement, but my longer piece seemed okay. I would hate the skirt to be uncomfortable on a little tum!
I used a safety pin to help ease it through. It can help to round off the corners of the end you are feeding into the channel too.

Don't let the end of the elastic disappear into the channel...

Stitch it firmly in place, close to the end.

You can leave the other end free to allow for final size adjustments, though it's a wise idea to leave the safety pin in place to make sure it doesn't pull back into the channel.


You will now have a long flouncy strip that simply needs a seam up the back.

Ideally you try this on the little person, to see that the elastic is not too long. Pull the elastic up if necessary, then stitch in place close to the end.
Finally, with right sides together pin the strip into a circle and stitch up that back seam. As long as you have been accurate with your seam allowances and turnings, it will all match up.
Done!
If you're lucky, you will have put a little strip of leftover fabric in your pocket when you went out shopping and found a nice, matching t-shirt in the sale!


Ahhh! What a super post and a lovely little skirt, they look so cute in them. :-)
ReplyDeleteSo cute and you make it sound very straightforward. I might have to have a go in the holidays!
ReplyDeleteThanks
Ellie
x
Great post! They look lovely.
DeleteFabulous and your two models are precious.
ReplyDeleteThanks for sharing
Helen xx
PS I love the image of you sewing outdoors in a bikini.
Great post - I think I will have a go with twin needles
ReplyDeleteJulie xxxxxxx