I don't know how many of you out there have embraced the timewaster glory that is Pinterest, but if you have you may well have joined the ranks of those now officially too busy 'pinning' recipes, craft projects and exercises for flat tummies to actually find time to cook a proper meal, thread a needle or do anything more physical than swivel on a chair in front of the computer, exercising only the fingers in the form of a series of clicks and typed searches.
It's beginning to sound like I'm not a fan, but I am, really, I am! But I got to thinking it was about time I used those virtual pinboards more like the real thing - here's a reminder, now DO something about it.
So yesterday, I decided to tackle a 'pin' from my 'Craft Ideas' board. Only click the link if you don't want to play along with the 'guess-what-it-is-going-to-be' game I like for these kind of posts AND if you are happy to risk being sucked into the gloopy world of 'pinning'.
A few weeks back, this rather cardboard-y 100% wool jumper was about to go in the rag bag at the charity shop. It was definitely past selling so I kindly offered it a home (and gave a donation because to me it still had a value).

It may only be from 'Primark' but it's a sweet jumper. Look at the pretty ribbon trim at the back of the neck...

That had to be saved - bound to come in useful...

First I cut off the sleeves...

Then I cut matching, deeper openings down the side (leaving the rest of the side seams intact)...

Next I found the half-way point across the chest, at about the same level as the deep openings I had just created...

...and drew a steep mountain shape from the shoulder/neck edge to this point...

This was then cut out (again leaving the rest of the shoulder seam intact)...

So I ended up with what looked like a low-cut, baggy-armed tank top...
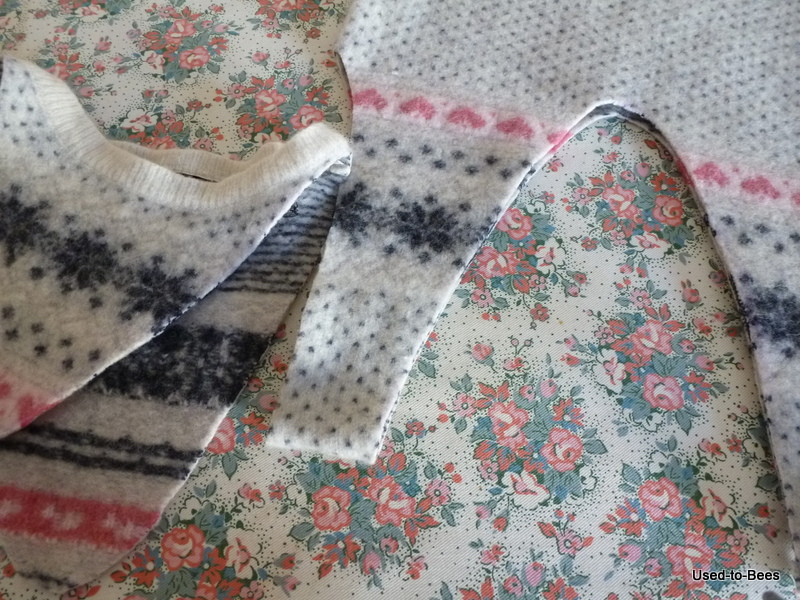
...and a cut out piece that rather resembled a pair of
warming ear-flaps. I tried these on (sorry folks, no photo here!)...

...noted a similarity between me and Deputy Dawg...

...and moved SWIFTLY on to the next bit of my project!
This was to stitch across the bottom of the jumper...

(which I had previously ironed flat,marked and cut straight as it was a bit mis-shapen)

I did this on the machine 'cos it needed to be strong.

Corners were trimmed...

The seam was ironed open...

...and then the base seam was placed on top of the side seam (from the original jumper) forming a point like so...

...and a line across was marked and stitched...

...which creates a gusset at the base.
Next I moved on to decoration.
Thin, slightly tapering strips were cut from the jumper remnants (from the 'ear-flaps', as I had decided they were not the look for me this winter)...

A piece of thread was attached to one end...

...and the strip was then rolled and stitched, stitched and rolled...

Sometimes I put a twist in too, stitching that in place at the base too...

Eventually, this creates little roses which can be used as embellishment...

I could have finished at that point, but I felt my article needed something more. I found a pretty remnant which I had bought from a charity shop for the princely sum of £1.85 some time back...

Matching tank-top shapes were cut, side seams were sewn and the gusseted-base process was repeated...
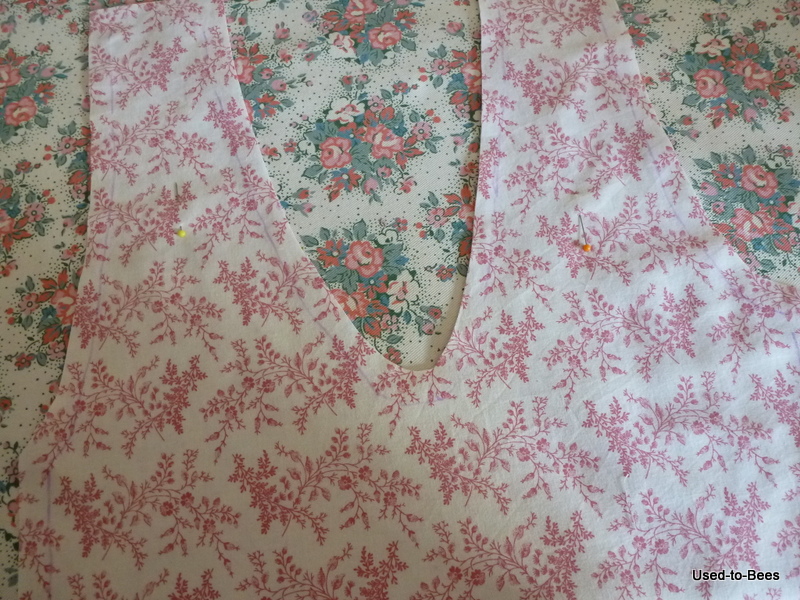

...to make a lining, the edges of which were ironed under (having clipped curves where necessary), before it was slid into place, pinned and blanket-stitched to the outer shell...

And there we have it!
A handy little bag.


It's the perfect size for a knitting project...

(But if you took the bits of cardi out, it could be a (not terribly secure) handbag.)


For another way to recycle old, wool jumpers, hop over to this post. I will return with more pins that have been turned to reality, and with what I did with all the left over bits of jumper - oh, and that bit of ribbon!
I really do love the bag, but I was expecting (hoping?!) a balaclava helmet with corsage embellishment...
ReplyDeleteBRILLIANT! I love it!
ReplyDeleteI do Pinterest and have some boards but I don't know how to repin!
Julie xxxxxxxxxxxx
Good morning - just found your blog via Floss's sidebar :)
ReplyDeleteGreat idea with the jumper - we get so many felted ones donated to our shop - shall have to rescue one now!
Totally delightful. I loved seeing the transition ! Not yet been on pinterest.
ReplyDeleteWow, this is great! I will definitely look at old jumpers in a new light! Ada :)
ReplyDeleteWhat a neat transformation.
ReplyDeleteNina x
Great makeover. I agree Pinterest is full of great ideas that we could while away many hours perusing so it is important to be productive also.
ReplyDeleteWhat a lovely bag - a great way to reuse and recycle! I made some mitts from an old cardi once, but this is far more stylish.
ReplyDeletePomona x
That is great, I need somewhere to put my knitting as it is always laying around the house!
ReplyDeleteWhat a great idea! Do you know though, as I'm working my way backwards thru your last couple of posts, I thought this was the tutorial for the little bootees until you revealed, to my surprise, the bag!!!
ReplyDeleteI know exactly what you mean about Pinterest - i try and keep clear now as you can "waste" good sewing time being inspired by other people who have actually got on and made something!
Gill xx
Aah, you're so clever. You should link these type of posts up with my Ta-dah! Tuesday posts. I have weaned myself off Pinterest recently but the cravings are getting strong again!
ReplyDeleteFrom rag bag to fab bag via wonderful green creativity.
ReplyDeleteCarol xx